AdSense PIN verification is perhaps one of the most significant steps for
beginners in order to monetize their Blogger websites or YouTube channels.
These mechanisms are essential to ensure the correctness of your identity and,
especially, your address.
AdSense will send you a letter, which contains a PIN (Personal Identification
Number), directly to your home, and you will need to input the numbers into
your account. By doing so, your AdSense account will be fully activated, and
you'll be able to actually receive payments once you have reached the $100
threshold.
 |
| My AdSense PIN apparently sent from Malaysia. |
Read also:
How Many Articles Do You Need to Get AdSense Approval for Blogger?
My Essay on The Reality of Blogspot and AdSense Monetization
Without AdSense PIN verification, you will not be able to receive
payment, even though you've reached your threshold. AdSense will also
temporarily stop showing ads on your website if you miss a certain deadline.
Therefore, you have to pay careful attention to AdSense PIN verification steps
because it will affect your income.
I'd like to describe my experience in dealing with the AdSense PIN verification
process. However, I'd like to note that I did my PIN verification in 2020.
Therefore, I do not know whether the process has changed or not. Nevertheless,
I don't think the AdSense PIN verification process will be much different.
I decided to not write an article about AdSense PIN right away because it's a
bit sensitive. So, about one and a half years later, I'm ready to tell you about my
experience!
Earn $10 in AdSense to Begin ID and PIN Verification
So I was able to start identity (ID) and AdSense PIN verification by earning $10. If you are
Indonesian, you need to earn Rp130,000 to start the verification
process.
The PIN verification process itself is actually not that hard. However,
earning your first $10 is actually quite challenging if you are only relying
on one free Blogspot website.
For personally, it took me several months to get $10 from one Blogspot
website. Your income at first will be very, very low.
I remember my first income from one Australian visitor; it was only Rp19
or around $0.0013! Very very low!
Your income will gradually increase naturally as your website grows and you
receive more organic traffic. Based on my experience, I was able to boost my
income significantly when my articles were able to rank on Google's top 10
search results.
If you want to quickly request the AdSense PIN, I suggest you:
- Monetize an established website that already has steady traffics.
- Have a top-level domain (such as .com).
Focus on ranking by writing good articles and paying attention to good SEO
principles.
The topic of your website can be about anything, but it's always important to
write well. Be patience!
Once you have earned $10, AdSense will display a notification that says, "Your payments are on hold. Action is required to release payment." on top
of your account. You will also receive an email from Google Payments which
tells you to verify your identification.
Please note that the $10 or the Rp130,000 threshold is not the accumulated
balance but your total income.
For example, my accumulated balance from
previous months is $8 (as you can see from your AdSense account dashboard).
But today, I received $2 in income. So even though my income has not been
accumulated yet, I have received a total of $10. Email and notifications will
appear right away.
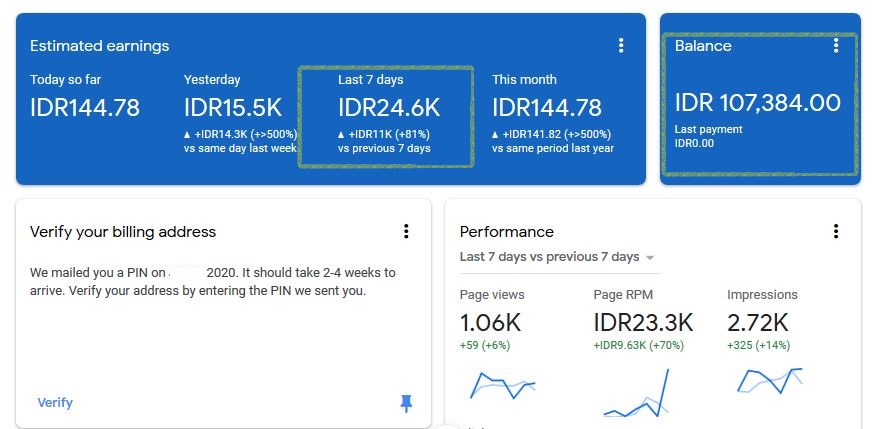 |
Another example, the balance is still only Rp107,00, but the person received Rp24,000 this week, so he has Rp131,000 total. Thus he is ready for identity and AdSense PIN verification. |
If you see such notifications, do not panic. It means that you are eligible to start your ID and PIN and verification process!
Read also:
How to Fix Valuable Inventory: No Content in AdSense Violation
How to Use follow.it to Replace Blogger's FollowByEmail Gadget - Free
Feedburner Alternative
Start AdSense Identity Verification Process
Before AdSense send you a PIN, you will need to do identity verification
first. You will be required to upload a picture of your valid official
identity card issued by your government.
It can be a passport, driver's license, or your national identity card; just pick one of them.
To do identity verification, go to your AdSense account, then select
Payment. You will notice a red warning which says "Verify your identity." and a "VERIFY NOW" button.
Before you click on the verify now button, please note that there are
several requirements for your identification document picture.
Do not take this step lightly; you have a limited amount of chances (if I
recall correctly, you are given 3 chances) to upload the correct and valid
identity card picture! If you failed to upload the required photo, your account
might get locked out, and you might need to contact AdSense to complete the
identification process (which may not be feasible).
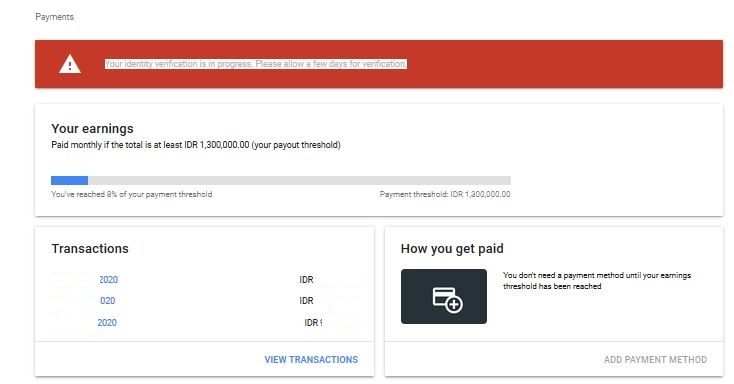 |
Identity Verification Process |
Tips for taking the identity card picture:
Capture the entire document, including all four corners. It must be a full
picture of your identity card!
Your image must be readable, in focus, and
free of reflections and glare. Please note that if your card is old
and the data is unreadable, it is better to renew it first!
Do not upload expired documents! Select the clearest, cleanest, and
newest document (Passport, National Identity Card, or Driver's License).
For Indonesians only, if your national identity card is expired, even
though it is legally valid, it will not be accepted by AdSense.
Incomplete or obstructed documents or dark or blurry photos won't be
accepted.
To prevent abuse, AdSense only allows a limited number of verification
attempts.
Uploading documents or photos other than what is requested may result in
account suspension. Do not upload the wrong picture. Only a picture of your Passport, Driver's License, or National Identity
Card is acceptable. Other documents are not accepted!
In my experience, I used my driver's license card. It was my newest and clearest
official document, and it worked well!
Once you have taken the correct and clear picture of your document, you can
click the VERIFY NOW button in the AdSense Payment section. You will be required
to fill in your identity.
Make sure that the information, your name, and the address that you enter match the information written on your selected document.
 |
Once you have submitted your documents, you will need to wait for the AdSense confirmation email. |
Review your information, and again, make sure that it matches your
document. After that, you can upload your identity card photo and submit it to
AdSense.
After you have submitted your information and document photo, AdSense will
verify it. It may take several days until you get a reply from AdSense. If it is
successful or failed, AdSense will notify you via email. If it is not
successful, you can attempt to try it again. Just make sure that you follow my
tips above!
In my case, AdSense verified me in just 6 hours. I received an email
that stated that my identity had been successfully verified. I can set up a
payment method right away, but I chose to wait until I received my PIN and
verified my address first.
Waiting for AdSense PIN
After you have successfully finished the identification process, AdSense will
send you a physical letter that contains the PIN directly to your house! This is quite an exciting and
anxiety-inducing process.
It says that you will receive the PIN in 2 - 4
weeks. If you have not received the PIN after 4 weeks, you are allowed to
request the PIN again. Make sure that your address is correct; you can modify
it at this stage.
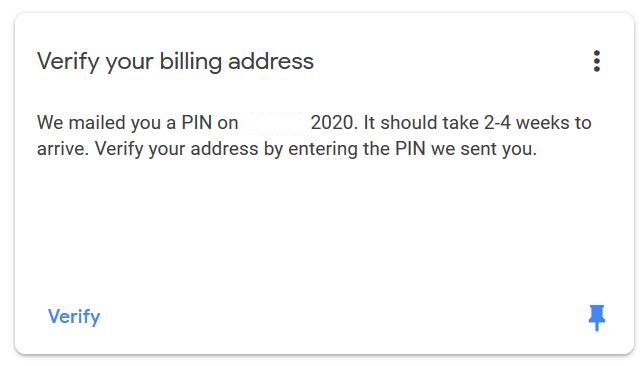 |
AdSense PIN to verify the billing address. |
In my case, I had to wait for over a month until my AdSense PIN arrived. I
had to wait more than 4 weeks because of the pandemic situation.
After 4 weeks had passed, I clicked Verify and then chose the "Resend PIN"
button for an additional PIN. Do not try to submit a random PIN. You have a
limited amount of attempts to submit the correct PIN.
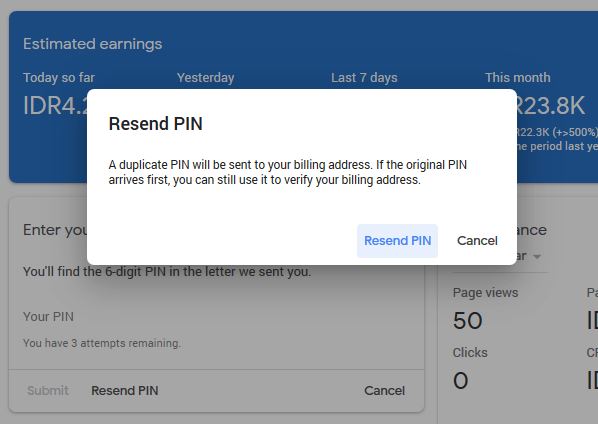 |
Requesting resend PIN in AdSense |
After around 8 weeks, my PIN arrived at the local post office. I
actually went to the post office before to confirm if my PIN had arrived or
not.
The post office staffs were kind enough to notify me directly when the PIN had
arrived, so I picked it to the office myself because I was so excited.
Normally, the post office will deliver it to your house.
I actually ended up receiving two PINs, the first PIN was delayed
because of the pandemic, and the second one was because I clicked the "Resend PIN"
option. They contain the same set of numbers.
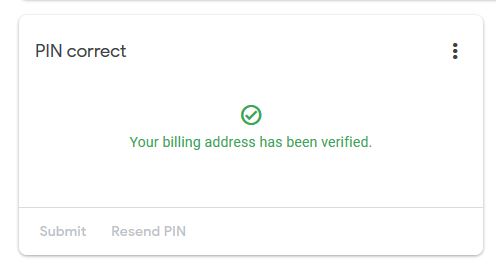 |
AdSense PIN verification is successful. |
I entered the PIN into my AdSense account and clicked Submit, and it was successful!
My tips for AdSense PIN verification:
Be patient; wait until it is 4 weeks. If it has not arrived, do not panic. Select the "Resend PIN" option. AdSense PIN delivery will be longer if your
home has an uncommon address or if it is located in a remote place.
AdSense PIN may usually be delivered a bit late but do not worry! As long as
you complete your PIN verification within 6 months (which is plenty of
time), your account will not be badly affected.
Make sure that your address is correct before you ask for AdSense to resend the PIN.
- Go to your local post office and check with them directly.
I'd like to discuss setting up the payment method and bank verification
process in AdSense. However, this article has gotten too long. If you want to know about AdSense payment method and bank verification, read here: How to Add Payment Method in AdSense and Verify Your Bank Account.
